The Greenhouse
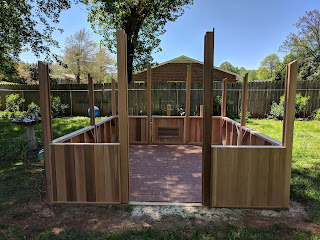
The greenhouse was a kit that I ordered from Cedar Built--a Canadian based company that uses reclaimed cedar from fallen trees and makes cedar kit greenhouses. I purchased the 10x12 foot freestanding greenhouse, choosing a dutch door, with acrylic window. The greenhouse has two roof vents that open automatically when the internal temperature of greenhouse gets to a certain temperature. The rest of the glazing was double walled polycarbonate. I ordered the kit in January and it was to arrive in April/May. Once weather started to warm up and possibility of snow gone, it was time to put the foundation for the greenhouse down. Here is a picture of the site before any construction. I chose a spot in the yard that gets maximum light in the winter--I spent two winters gauging the sun's progress across the yard and this was the optimum site.

After tilling the spot many ways, the ground was ready for me to dig out the spot for the foundation beams. I chose 4x4 cedar posts as I am trying to be green in my yard.

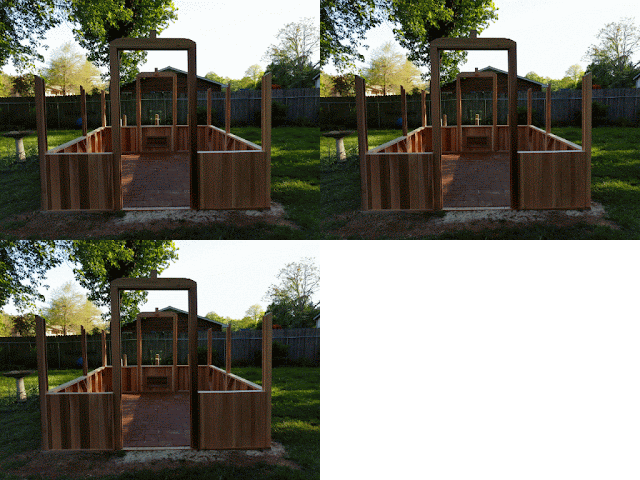
I laid down pea gravel and then sand and then the 4x4 posts. The view you see is the 10 foot front of the greenhouse.

I took pictures of each day's progress. This was an intense labor activity. I used the thin 4x8 pavers as I intended to use sand in between them and no cement. As this was going to be a greenhouse housing lots of water, I wanted a base that could allow any water to exit easily. Once I had the foundation beams in, I had to check the weather forecast and plan on laying the brick down during a time of no rain. If any rain had fallen during this time, I would have had to retill area to guarantee that the area would be level. However, if able to do all paving before any rain, then area should stay about the same and level equally across.
400+ bricks later, the greenhouse foundation has been laid. I covered with sand and waited for the rains to come. The rain would aid in the settling of the brick and the sand filling in the cracks between the bricks.


Here is the packing list that I discovered after opening all of the crates and pulling the wood/parts out. Had I known about the list, it would have been much easier to figure out what was what. And below are the instructions to build the kit--23 pages of architectural styled drawings of how to build.
I dislike Ikea, but gosh, I would have gladly given anything for Ikea styled instructions. I read these instructions numerous times and still was not totally understanding everything. However I was not daunted as I had intended on hiring a friend and his helper to aid me in building the greenhouse,


Here I am on day one ready to build the greenhouse. I started without my friend as I figured he was running late. However, due to whatever reasons, my friend bailed on me--still do not know why. So, I decided to build greenhouse by myself. (What a dumb idea.)
Ridge beam day installation--This was only 2nd day into build and I had to take a break. The sucker was heavy. I texted my neighbor and she said she and her husband would be over that night and help me out. Poor husband did not even know what she had agreed him to, but they are wonderful people. They helped me nail in place too as they were afraid I might hurt myself. Thanks to Lisa and Russell.
Time to start installing the windows. There were 41 in all to install.
Here is the back view of the greenhouse, along with the raised veggie bed--post dog rearrangement. The dogs got into the 22 inch raised bed and dug everything up--I cried when I discovered that after being gone on a trip. I tried to fix/find the plants and found some. Dogs rearranged once or twice more until I found a way to convince them to stay out of the bed--and no, I did not kill any dogs. I wanted to I must admit.
Here is the completed greenhouse. I have to adjust the door a bit as I am a bit off in my greenhouse--that squaring bit came into action here. Door opening wider at the bottom and perfect at the top. I will figure it all out. The door works and so that is all that matters.
Building this greenhouse was the greatest building challenge I have experienced to date and I have built other structures in my life--biggest before this was the 8x8x9 foot treehouse I built for my girls. (One day, I would like to build a cabin somewhere.) I was constantly challenged by the instructions as they were hard for me to interpret. I emailed Cedar Built and the sales rep is also the owner, Jane and she was instrumental in aiding me in understanding the instructions. I wound up emailing her almost every day of building the greenhouse, even on Sundays, and she always emailed me back within a few hours (at most) and was able to help me stay on track building the greenhouse. I could not have built this greenhouse without that wonderful customer service from Cedar Built. A big thanks to them.
In another post I will discuss the conversion of everything to doing aquaponics--this post is long enough.

After tilling the spot many ways, the ground was ready for me to dig out the spot for the foundation beams. I chose 4x4 cedar posts as I am trying to be green in my yard.

I laid down pea gravel and then sand and then the 4x4 posts. The view you see is the 10 foot front of the greenhouse.

I took pictures of each day's progress. This was an intense labor activity. I used the thin 4x8 pavers as I intended to use sand in between them and no cement. As this was going to be a greenhouse housing lots of water, I wanted a base that could allow any water to exit easily. Once I had the foundation beams in, I had to check the weather forecast and plan on laying the brick down during a time of no rain. If any rain had fallen during this time, I would have had to retill area to guarantee that the area would be level. However, if able to do all paving before any rain, then area should stay about the same and level equally across.
400+ bricks later, the greenhouse foundation has been laid. I covered with sand and waited for the rains to come. The rain would aid in the settling of the brick and the sand filling in the cracks between the bricks.
I finished the paving and eagerly awaited the arrival of the greenhouse kit. The kit arrived on a Thursday in May. It consisted of 7 crates that weighed about 1500 pounds. The driver helped me get the crates into my garage, in the rain, I might add. I spent the weekend opening the crates and unpacking the boxes and labeling the parts. It took me one night just to open the crates and they were stapled down with the longest staples I have ever seen. I had to beat those suckers to separate the lids from the sides. It took me two more days to open the crates down the sides as these were stapled as well as screwed. Some of the side walls were screwed into the crates and this was an interesting task to open crate and unscrew the walls. I have to admit that my vocabulary consisted of only a few 4 letter words, said repeatedly and quite loudly. I got bruised and banged and bled during this endeavor.


Here is the packing list that I discovered after opening all of the crates and pulling the wood/parts out. Had I known about the list, it would have been much easier to figure out what was what. And below are the instructions to build the kit--23 pages of architectural styled drawings of how to build.
I dislike Ikea, but gosh, I would have gladly given anything for Ikea styled instructions. I read these instructions numerous times and still was not totally understanding everything. However I was not daunted as I had intended on hiring a friend and his helper to aid me in building the greenhouse,


The walls were easy to assemble as they can in panels. And things were labeled for extra help. I learned about squaring on this day. I had not known to do that for my brick foundation, so it is level, but not squared. It messed me up only a little bit. Thank goodness.
Here is one of my helpers. I had help from the 3 dogs at times. Sometimes they would steal my stuff in order to convince me to come play with them. Cute and annoying. I debated over staining the greenhouse--did not want to do. I am so over painting right now. However, every person I asked said to stain it. Drat. So i did. I chose a really nice, expensive stain from Lowes because I do not ever intend to reapply a stain to greenhouse again. Staining took many days to accomplish due to weather and all. However, I must admit, it did come out pretty nice when done.
Each window also had trim pieces that had to be nailed down on the outside--Cedar Build thought of everything in this kit.
View of greenhouse from my kitchen window. Look closely and you can see the chickens roaming the yard. To me, this view is absolutely a dream come true. I have wanted a mini farm since I was in my teens/twenties and now, it is coming true.
Here is the interior of the greenhouse. I built the deep soil benches and the simple shelf bench. The left side will become the fish tank, holding about 350 gallons of water. The right side will be the horizontal planting beds. The fish tank is 30 inches tall and the floor/base of it is the brick pavers. The planting bed has 2x4's for the floor/base and is 18 inches deep. However, it is at 30 inches in height to match the shelves and other bench. So, it looks nice when viewed all together.
I hired a professional electrical company to come out and wire the greenhouse and trench the line to the house. The electricians were great as they helped me with design and ideas that I had not thought to do--especially like having an overhead light in the greenhouse. McMillon Electrical Company is a great Lenoir based company--I have used them over 10 years.
In another post I will discuss the conversion of everything to doing aquaponics--this post is long enough.


This is an impressive undertaking!
ReplyDeleteGreat job!